Bernd-Arno Behrens, Gerhard Poll, Kai Möhwald, Simon Schöler, Florian Pape, Dennis Konopka, Kai Brunotte, Hendrik Wester, Sebastian Richter, Norman Heimes (2021); Nanomaterials, Volume: 11, Number: 6, Page: 1363


Description
The Hysitron TI 950 TriboIndenter can be used to characterise surfaces on the nano scale. In particular, mechanical properties nearly to the surface can be measured. Nanoindentation can be used to examine the hardness of thin coatings as well as individual microstructural components. In contrast to conventional hardness testing, nanoindentation does not evaluate the permanent indent, but instead the hardness is determined via the force indentation curve. This offers the advantage that the modulus of elasticity can also be determined during unloading. Hardness testing can be performed via separate, targeted indents or via large-area hardness maps. XPM (X Property Mapping) can be used, for example, to represent joining zones or microstructural compositions via the various mechanical properties. The figure on the right shows an optical image of an aluminium alloy before and after an XPM measurement. The corresponding hardness and Young's modulus maps can be seen in the lower right figure and show very well the different properties of the alloying elements.
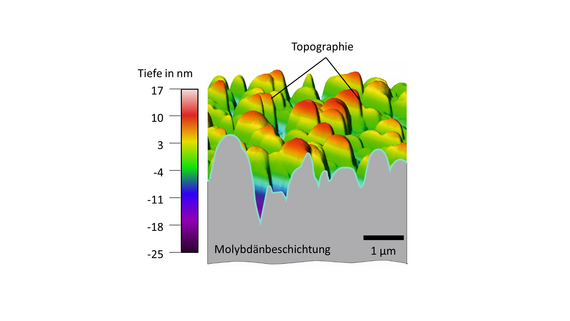
High resolution surface profiles and roughness can be recorded and imaged via in-situ SPM (scanning probe microscopy). Furthermore, nano-wear investigations can be performed to study the wear behaviour of, for example, thin coatings under varying loads and repetitions. The wear development of a MoO3 coating under different loads and repetitions is shown in the figure on the left.
In addition to wear tests, further tribological investigations can be carried out by means of scratch and sliding tests. Here, the tangential and normal forces can be recorded during the test and a friction value calculated via Coulomb's friction law. Furthermore, the scratch tests can be used to quantify the elastic and plastic material behaviour by means of pre- and postscans.
Temperature-dependent properties of materials are often required. To meet these requirements, tests up to 700 °C can be carried out in an inert gas environment to determine, for example, the development of hardness or Young's modulus.
Publication
As a result of global economic and environmental change, the demand for innovative, environmentally-friendly technologies is increasing. Employing solid lubricants in rolling contacts can reduce the use of environmentally harmful greases and oils. The aim of the current research was the development of a solid lubricant system with regenerative properties. The layer system consisted of a molybdenum (Mo) reservoir and a top layer of molybdenum trioxide (MoO3). After surface wear, Mo is supposed to react with atmospheric oxygen and form a new oxide. The determination of the wear volume of thin layers cannot be measured microscopically, which is why the wear behavior is initially determined on the nano level. In this work, single Mo and MoO3 coatings prepared by physical vapor deposition (PVD) are characterized by nano testing. The main objective was to determine the wear volume of the single coatings using a newly developed method considering the initial topology. For this purpose, nano-wear tests with different wear paths and normal forces were carried out and measured by in situ scanning probe microscopy (SPM). Based on the characteristic values determined, the coefficient of wear was determined for wear modeling according to Sarkar. The validation of the wear model developed was carried out by further wear tests on the respective mono layers.


